And So We Begin…

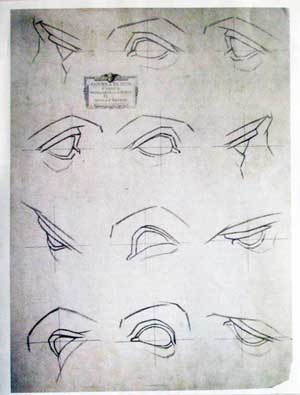
Starting off on our journey through the Bargue course, we encounter a number of plates that deal with specific anatomical features drawn in a simplified manner. Plate 1 deals with eyes – an appropriate place to start, since we’re concentrating on learning how to “see” as artists. The plates in the book are reproduced smaller than the originals, which are about 18″ x 24″, so I first scanned the plate, placed the image in an 18 x 24″ document, and printed it out full-size in sections on smaller sheets of paper. I want to deal with each drawing one at a time, so I cut out the first one and taped it onto my drawing board.
The method I’m using to draw the plates (and the method recommended in the text) is the sight-size method, where the drawing surface is placed directly beside the object to be drawn. The artist observes the original from a distance of a few paces back, using a plumb-line with a weight attached to the bottom, and measures distances visually, either with his plumb-line or some other measuring device, such as a pencil or skewer. The artist then steps forward and makes a mark on the paper when a correct measurement has been made. He continues comparing measurements to each other until the drawing is constructed in the exact same proportions as the original. Confused yet? That’s what I thought… Ok – now that I’ve written that extremely short and cryptic explanation of the sight-size method, why not check out the more detailed explanation at www.sight-size.com. Darren Rousar has written an extremely helpful book that guides you through the process step-by-step. I own a copy and highly recommend it!
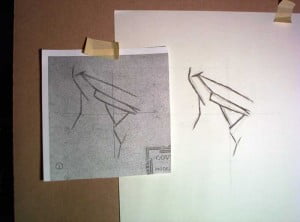
Plate 1.1

When I began this drawing, it was the first time that I had ever used the sight-size method. Let me say – it takes some practice to get the hang of it… There are an awful lot of smudges and eraser marks on the final piece, but I have to admit – the method helped me to create a very accurate copy of the drawing. When I was finished I compared a tracing of the original to my drawing and was pleasantly surprised to see how close it was! I ran into a little trouble on the bridge of the nose, but everything else matched up pretty well.
As far as methods & materials – I’m using Windsor & Newton soft & extra-soft vine charcoal on Strathmore laid charcoal paper. I used to dislike charcoal because of how messy it is, but recently I’ve become a convert. I love being able to build up such a wide range of tone without cross-hatching for seven hours! It’s also very easy to match the thickness of the line from the originals in these exercises. I use a wooden block with sandpaper strips on it to sharpen the charcoal, and honestly, I’ve found that once you’ve held the vine charcoal in your hand for a few minutes, it doesn’t rub off on your skin as much. Not like the compressed charcoal, anyway…
Overall, it took me about 2-3 hours for this one drawing. That seems kind of long for such a simple piece, but I had the sight-size learning curve going against me.I also had to re-draw my lines a few times as I would discover mistakes upon comparing different measurements.
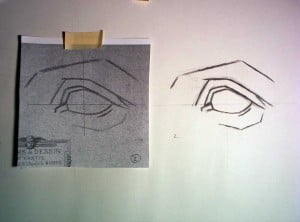
Plate 1.2

Well, this one didn’t work out so well. I spent a couple of hours on it and was fairly satisfied that it looked accurate, but when I laid the tracing over top, I discovered that it was dreadfully out of whack! Being undeterred, I put up a new page on my drawing board and started over. After about 2 more hours I once again ended up with a drawing that I thought had looked good, but ended up being fraught with internal measuring errors. Understanding the atelier attitude of “it’s ‘good enough’ when it’s perfect” I bravely forged onward with another blank sheet and tried again. This one only took about an hour and a half. Mostly because I was rushing it, wanting to move on from this stupid drawing that never worked out no matter how many stupid times I drew the stupid thing…
It ended up being better – still not perfect, mind you – but better than before. After a heavy sigh, I decided that it was best to keep moving rather than kill all of my enthusiasm at the very start of what will be a very long project. So, for now it’s on to the next one… I’ll post again when I’ve made some progress.