Excellence Is as Excellence Does…
It’s now been one month since I began this blog and I’m delighted to see how much it has helped me so far. My primary reason for developing it was to have a strong motivator to keep me moving through the Bargue course. My first priority is to do the course correctly – avoiding the mistakes that come from impatience and a “good enough” attitude towards my work. I knew this would prolong what is already a very long course of study (especially for those of us who can’t work in the studio everyday), so I figured why not put my progression on the world stage and provide some support and motivation for others out there who dream of being a skilled artist, but are trying to balance a job, a family, or both. Hopefully those seeds of encouragement that I’ve sown will produce a crop over time. And – regarding that “good enough” attitude that runs rampant in the world – if any of us want to become excellent at what we do, we must begin now, and not accept poor results when we know we have the potential to do better. This boils down to plain old laziness – one of the evils we must overcome in our pursuit of excellence. Ok, enough preaching for now. Let’s get down to business…
Bargue 1.7

I completed this drawing tonight in about 1.5 hours. I was happy to see that it turned out to be very accurate, barring a crooked line here or there, of course… This drawing is a tricky one. The overall shape is tall and narrow, which I feared would make the reference points harder to place using the sight-size method. Perhaps this was a healthy fear, because it made me check and double-check every point I marked at the beginning of the drawing (before I actually drew any lines). The finished drawing matched the transparency overlay of the original very closely, so I considered it to be a success, but not quite as much as plate 1.6 was. I had to erase a lot of lines that were either curving the wrong way, too much, or not enough, which made the finished drawing a rather smudgy mess. Again, line thickness played a big part in getting a better resemblance of the original.
The Process
I’ve decided to show the steps I took to complete plate 1.7 this evening, as the last instructional post I wrote, “How to Sharpen Vine Charcoal”, elicited a number of appreciative comments from those of you who have been following along.
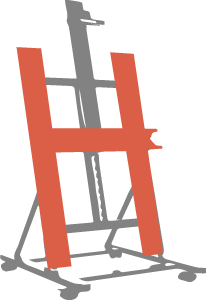
Step 1 – The Setup

In preparation for beginning the Bargue course, I purchased some high-density fiberboard at a hardware store and had it cut to 20″ x 26″ to accommodate drawings up to 18″ x 24″ – a size that I wanted to work in. Whenever I’m working on drawings I put this board up on my easel so I can stand up to draw – something I had never tried until this past winter. Now that I’m used to it, I can’t imagine sitting down to draw ever again! Anyway, I then tape a copy of the plate to the left side my board at eye-level, using my plumb line to make sure it is straight vertically. For a plumb line, I use a length of black thread with a 5/8″ metal nut tied to one end. Once I have the copy in place, I tape my blank piece of charcoal paper up beside it so that the edge of the paper slightly overlaps the copy. When working sight-size, it is best to cover up distracting visuals (like a gap between the two pieces of paper), as it helps when you’re quickly flicking your eye back and forth to check the accuracy of your drawing against the original. The paper I’m using is Strathmore 64 lb. laid charcoal paper.
Now that I’ve got my paper on the board, I use a ruler to draw a straight line horizontally across from the original to match the reference line that Bargue used on his drawings. I then draw the perpendicular with a ruler, using my plumb line to make sure it is absolutely straight. Now we’ve got the framework to make measurements against and we’re ready to begin!
Step 2 – Placement of Key Points
To begin placement of the drawing, we need to identify the points where the lines of the drawing cross the reference lines and mark them accordingly. To determine their position, I make measurements with my fingers and plumb line using the sight-size method.
To use sight-size, you must stand back from the drawing board a few paces – enough that you can see both the drawing and your paper in plain view without having to turn your head. There are some semi-scientific rules about how far to stand back from your subject – like three times the length of the largest proportion of your drawing – but you’ll find that you can get a little closer with the Bargue plates since they are two-dimensional and don’t suffer quite as much distortion of view as a three-dimensional object would when one is standing too close to the setup. Distortion is the main reason for following the 3x guideline. I usually stand back about two long paces. It is imperative that you always view the drawing from the same spot, centered in between your subject and your paper – it’s a good idea to mark the spot with tape so you always make sure you’re in the same viewing position. Always keep the easel in the same spot until the drawing is complete, and even consider wearing the same shoes each time you work on it. For three-dimensional subjects, make sure that your light-source can remain constant for the duration of the drawing. One more thing – never look at your subject while you’re standing at the drawing board making a mark. Always observe from your viewing position, then step forward to make your marks – even with the Bargue plates. I have been very surprised at how my eyes can deceive me, especially when standing up close. I find that the length of my marks are nearly always underestimated when I’ve tried to cheat this way…

To use the plumb line to make measurements, stand in your viewing position while holding your arms straight out in front of you with the thread stretched taut between your left hand and right hand. Close one eye and hold the thread parallel with the horizontal construction line on the original Bargue drawing. Using your thumbs as your measuring tool, measure the distance from the very center of the construction lines (where the horizontal and vertical lines cross) to the furthest point on the right of the drawing where one of the drawn lines crosses the construction line. In this case, it’s the point marked with the orange circle.
When you’ve got the distance measured in the thread between your thumbs, rotate your body slightly to the right (while keeping your arms straight out in front of you and the same eye closed) and find the same measurement on your drawing – measuring from the center of the construction lines you’ve replicated on the paper. After you’ve found the measurement with your fingers, drop your arms while keeping your open eye focused on the spot you just measured. Step forward and mark the spot with your sharpened charcoal. Step back to your viewing position and check your accuracy by first re-measuring from the original drawing and checking it against your placed mark. If the measurements don’t line up, use your chamois or kneaded eraser to get rid of the mark, then try again. This will take some getting used to – especially on your first drawing. I found that my arms would ache and it was sometimes hard to hold them still enough to get an accurate measurement. Give it time – you will get more comfortable with it and your arms will eventually get used to the movement, giving you much more stability. Trust me. Newbie tip: keep your charcoal tucked into the crook of your thumb while you’re measuring. It does no good to measure your distances and then have to look down to pick up your charcoal. I know that sounds stupid, but I’m embarassed to say how many times I had to stop and re-measure because I didn’t have my charcoal in my hand when I was ready to place the mark!
When marking these key points it’s best to start with the outer-most points around your drawing. If you read ahead in the Bargue course, you’ll see the more complex drawings using this simple method to define the boundaries of the object to be drawn.
Step 3 – Identify Other Points Along the Construction Lines

Once you’ve got the outer points defined, and you’ve rigorously checked your measurements to be sure they’re accurate, begin to work on the other points where the drawing lines intersect the construction lines. The best way to find these additional points is to use multiple measurements. For example, you can measure from the center point of the construction lines and from the other points you’ve already marked on the paper. Keep going back and forth from the original to your paper to be sure that your new marks are in the right spot. You’ll soon discover many different ways to ensure the correct placement of any given point.
Step 4 – Draw Your First Lines

Upon identifying a number of points that lie across the construction lines, it’s relatively simple to find the lines of the drawing that can be placed by simply connecting the “dots” that you’ve already made. The angle of lines that continue past your points is more easily determined this way. After every line is drawn, step back to your viewing position and check your measurements, to be sure that you’ve not gone too far with any of them. You can also begin to check the angles of your lines. This can be done with the plumb line, but I find it easier to use a wooden cooking skewer (with the sharp end removed, of course) because it remains rigid and is less prone to innaccuracy due to your arms wobbling around – since, if you’re new to sight-size, they’ve turned to jelly by this point anyway…
Step 5 – Using Triangulation to Find Difficult Points
This is a very important step and is well-illustrated by plate 1.7. One of the key points of this drawing is in the upper left corner where the eyelid meets the brow. All of the other lines work their way upward in the direction of this point, so identifying it will go a long way to helping you finish your copy. But how do we find a point that is out in open space, far from any reference line? The answer: triangulation!

Triangulation is finding a point in space by measuring from at least two other reference points. In the case of this important intersection, I need to measure the distances from both the horizontal and vertical construction lines to the place where my point lies (indicated by the orange arrows in the photo). To find the point I need to make an educated guess to start with. Sometimes, if you’re unsure of where a point lies, it’s best to just take a stab at it and get a mark down on the paper in the general vicinity of where you know it should be. Once you’ve got a mark to measure by, you’ve got something to work with to determine whether you need to go farther horizontally, closer vertically, etc. Just keep measuring and re-measuring until you’re sure you’ve got it in the right place. After I had this line drawn, I was able to place all of the subsequent points in relation to it.
Step 6 – Forge Ahead!

Now that you understand how to find key points using both the construction lines and triangulation, you can start thinking about your line quality. Great – one more thing to think about, right!? In order to achieve a somewhat accurate copy, you’re going to have to pay special attention to this important aspect of the Bargue drawings. If you can accurately reproduce these lines, you’re well on your way to becoming a master! I’ve found that my line thickness and curvature are what will make or break the drawing. As you’ll notice from the photo, I’m having quite a bit of trouble with the brow-line. Every time I would look at it in reverse with a mirror, I could tell it was somehow off, but it took me quite a bit of time to finally correct the problem (which helped contribute to that “smudgy mess” I described earlier…). My best advice is to take a break once you reach this point. Let your eyes rest for a bit before you come back to tackle any problem spots. Using a mirror helps, too, as it gives you a new perspective and can immediately point out errors that your eyes have gotten too tired to see. Just keep plugging away and you’ll soon have it. And, for Pete’s sake, don’t give up until it’s right!
Wrapping It Up

When you’re satisfied with the drawing, have checked and re-checked your measurements (yes, I’m going to keep saying that!), and have tried your hardest to assure that your line quality matches that of the original, it’s time for the ultimate test – the dreaded tracing-paper overlay! Simply trace the original drawing and lay this over top of your copy to see how you did. This will point out all of your errors (ugh…). To put it more positively, it will also point out all of your successes – because if you think it looks very close to the original, you’re bound to have many of them. It’s important to keep this in mind. Sometimes people get so caught up in everything they did wrong that they fail to recognize how much more they did right! As long as you find yourself improving with each drawing there’s no need to fret.
This course is designed to train your eye, and I’ve found, after doing only seven of the plates, that I have already seen a lot of improvement. In my post “Painting Break”, from July 14, I was impressed at how my oil painting benefitted from my work on the Bargue course. I not only had more sensitivity to see when something was incorrect, but I had much more patience than I had ever been able to exercise in any other painting – checking my brushstrokes over and over again to make sure the portrait was as accurate as possible. The result was the best grisaille portrait I’ve ever done. I really managed to capture the likeness of my wife in the painting and was extremely delighted and encouraged by it. To me, that was the best reward I could have received from slowly working through this course – especially since I am my own toughest critic… I have big hopes and dreams for the future of my work that seem more within my grasp now. I encourage all of you to do what you know is best to achieve your goals. Work hard, develop a plan, be persistent… With all of these things combined (especially persistence), it will be impossible to fail!